

Sending Messages
Create a new filecredentials.yml in the root folder of your Rasa
project (if you’ve used rasa init this file should already exist and you can
just edit it). Add the following lines to the file:
credentials.yml
slack_channel can be a channel or an individual person that the bot should
listen to for communications, in addition to the default behavior of listening
for direct messages and app mentions, i.e. @app_name.
To get a channel id, right click on the channel in Slack and choose Copy Link.
The id will be the last component in the URL.
In the next couple steps, you’ll create a Slack App to get the values for
slack_token and slack_signing_secret:
-
To create the app go to Your Apps and click
on Create New App.

-
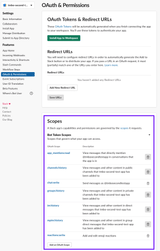
Head over to OAuth & Permissions and scroll down to Scopes. Scopes give
your app permission to do things in your workspace.
To get started, you should at least add the following scopes:
app_mentions:read,channels:history,chat:write,groups:history,im:history,mpim:historyandreactions:write.
-
On the OAuth & Permissions page, click Install App to Workspace to add
the bot to your workspace.
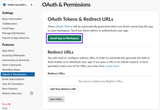
credentials.ymlas the value forslack_token:
credentials.yml
xoxb.
4. Head over to Basic Information to gather the Signing Secret.
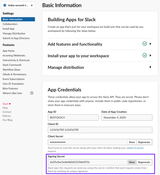
credentials.yml as the value for slack_signing_secret:
credentials.yml
Receiving Messages
Before continuing, make sure you have configured a Slack App for Sending Messages and have added Slack credentials to yourcredentials.yml file.
To receive messages, you will need a publicly available URL for Slack to reach
your bot and tell you about new messages. If you are running locally, you can
test channels using ngrok
- To configure your bot to receive messages, your bot needs to be running. Start your bot e.g. using
Allow users to send Slash commands and messages from the messages tab.
You might have to quit the Slack app and re-open it before your changes take effect.
/webhooks/slack/webhook, e.g.
https://<host>/webhooks/slack/webhook replacing <host> with your URL. If you
are using ngrok, your url should look like https://92832de0.ngrok.io/webhooks/slack/webhook.
You won’t be able to use a localhost url.
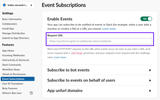
message.channels,message.groups,message.imandmessage.mpim.
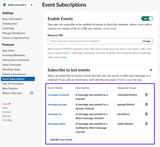
invite to channelsAs per Slack docs, make
sure you invite your bot to a channel it should be accessing. You can do this
by using
/invite in the channel.Optional: Interactive Components
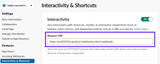
After you’ve completed Sending Messages and Receiving Messages your bot is ready to go. If you want to use Slack’s interactive components (buttons or menus), you’ll need to do some additional configuration: Open the Interactivity & Shortcuts page and toggle Interactivity to be on. Afterwards, you’ll need to enter the same url into the Request URL field which you used in Step 2 of Receiving Messages, e.g.https://<host>/webhooks/slack/webhook.
Additional Slack Options
Here is a complete overview of all the configuration parameters for the Slack connection:credentials.yml
credentials.yml for the changes to take effect.