> ## Documentation Index
> Fetch the complete documentation index at: https://rasa.com/docs/llms.txt
> Use this file to discover all available pages before exploring further.
# Authorizing Studio Requests
> How to setup authorization for the Studio API
## Introduction
Learn how to obtain the secret and client ID required for authenticating requests to Studio API. API is built using GraphQL, enabling powerful querying and mutations for flexible interaction with Studio API. For authentication, we rely on Keycloak to manage users and secure external communication by using OpenID Connect's "Client Credentials Flow".
### Studio-External Client Overview
The **studio-external** client is a default client in Keycloak for facilitating API integrations with Rasa Studio. This client is pre-configured with roles, ready for use without additional configuration.
Customers can use **studio-external** to:
* Manage conversations via APIs,
* Request urls to artifacts for CI/CD
This flexibility allows for quick integration or custom setups based on specific requirements.
**Note**: The instructions below cover both using the default client and creating a new one. If you decide to use existing **studio-external**, login to Keycloak admin and skip directly to [Obtain Client ID and Secret](/docs/studio/security/authorization#obtaining-client-id-and-secret)
## Creating a New Client ID
To create a new Client ID in Keycloak, follow these steps:
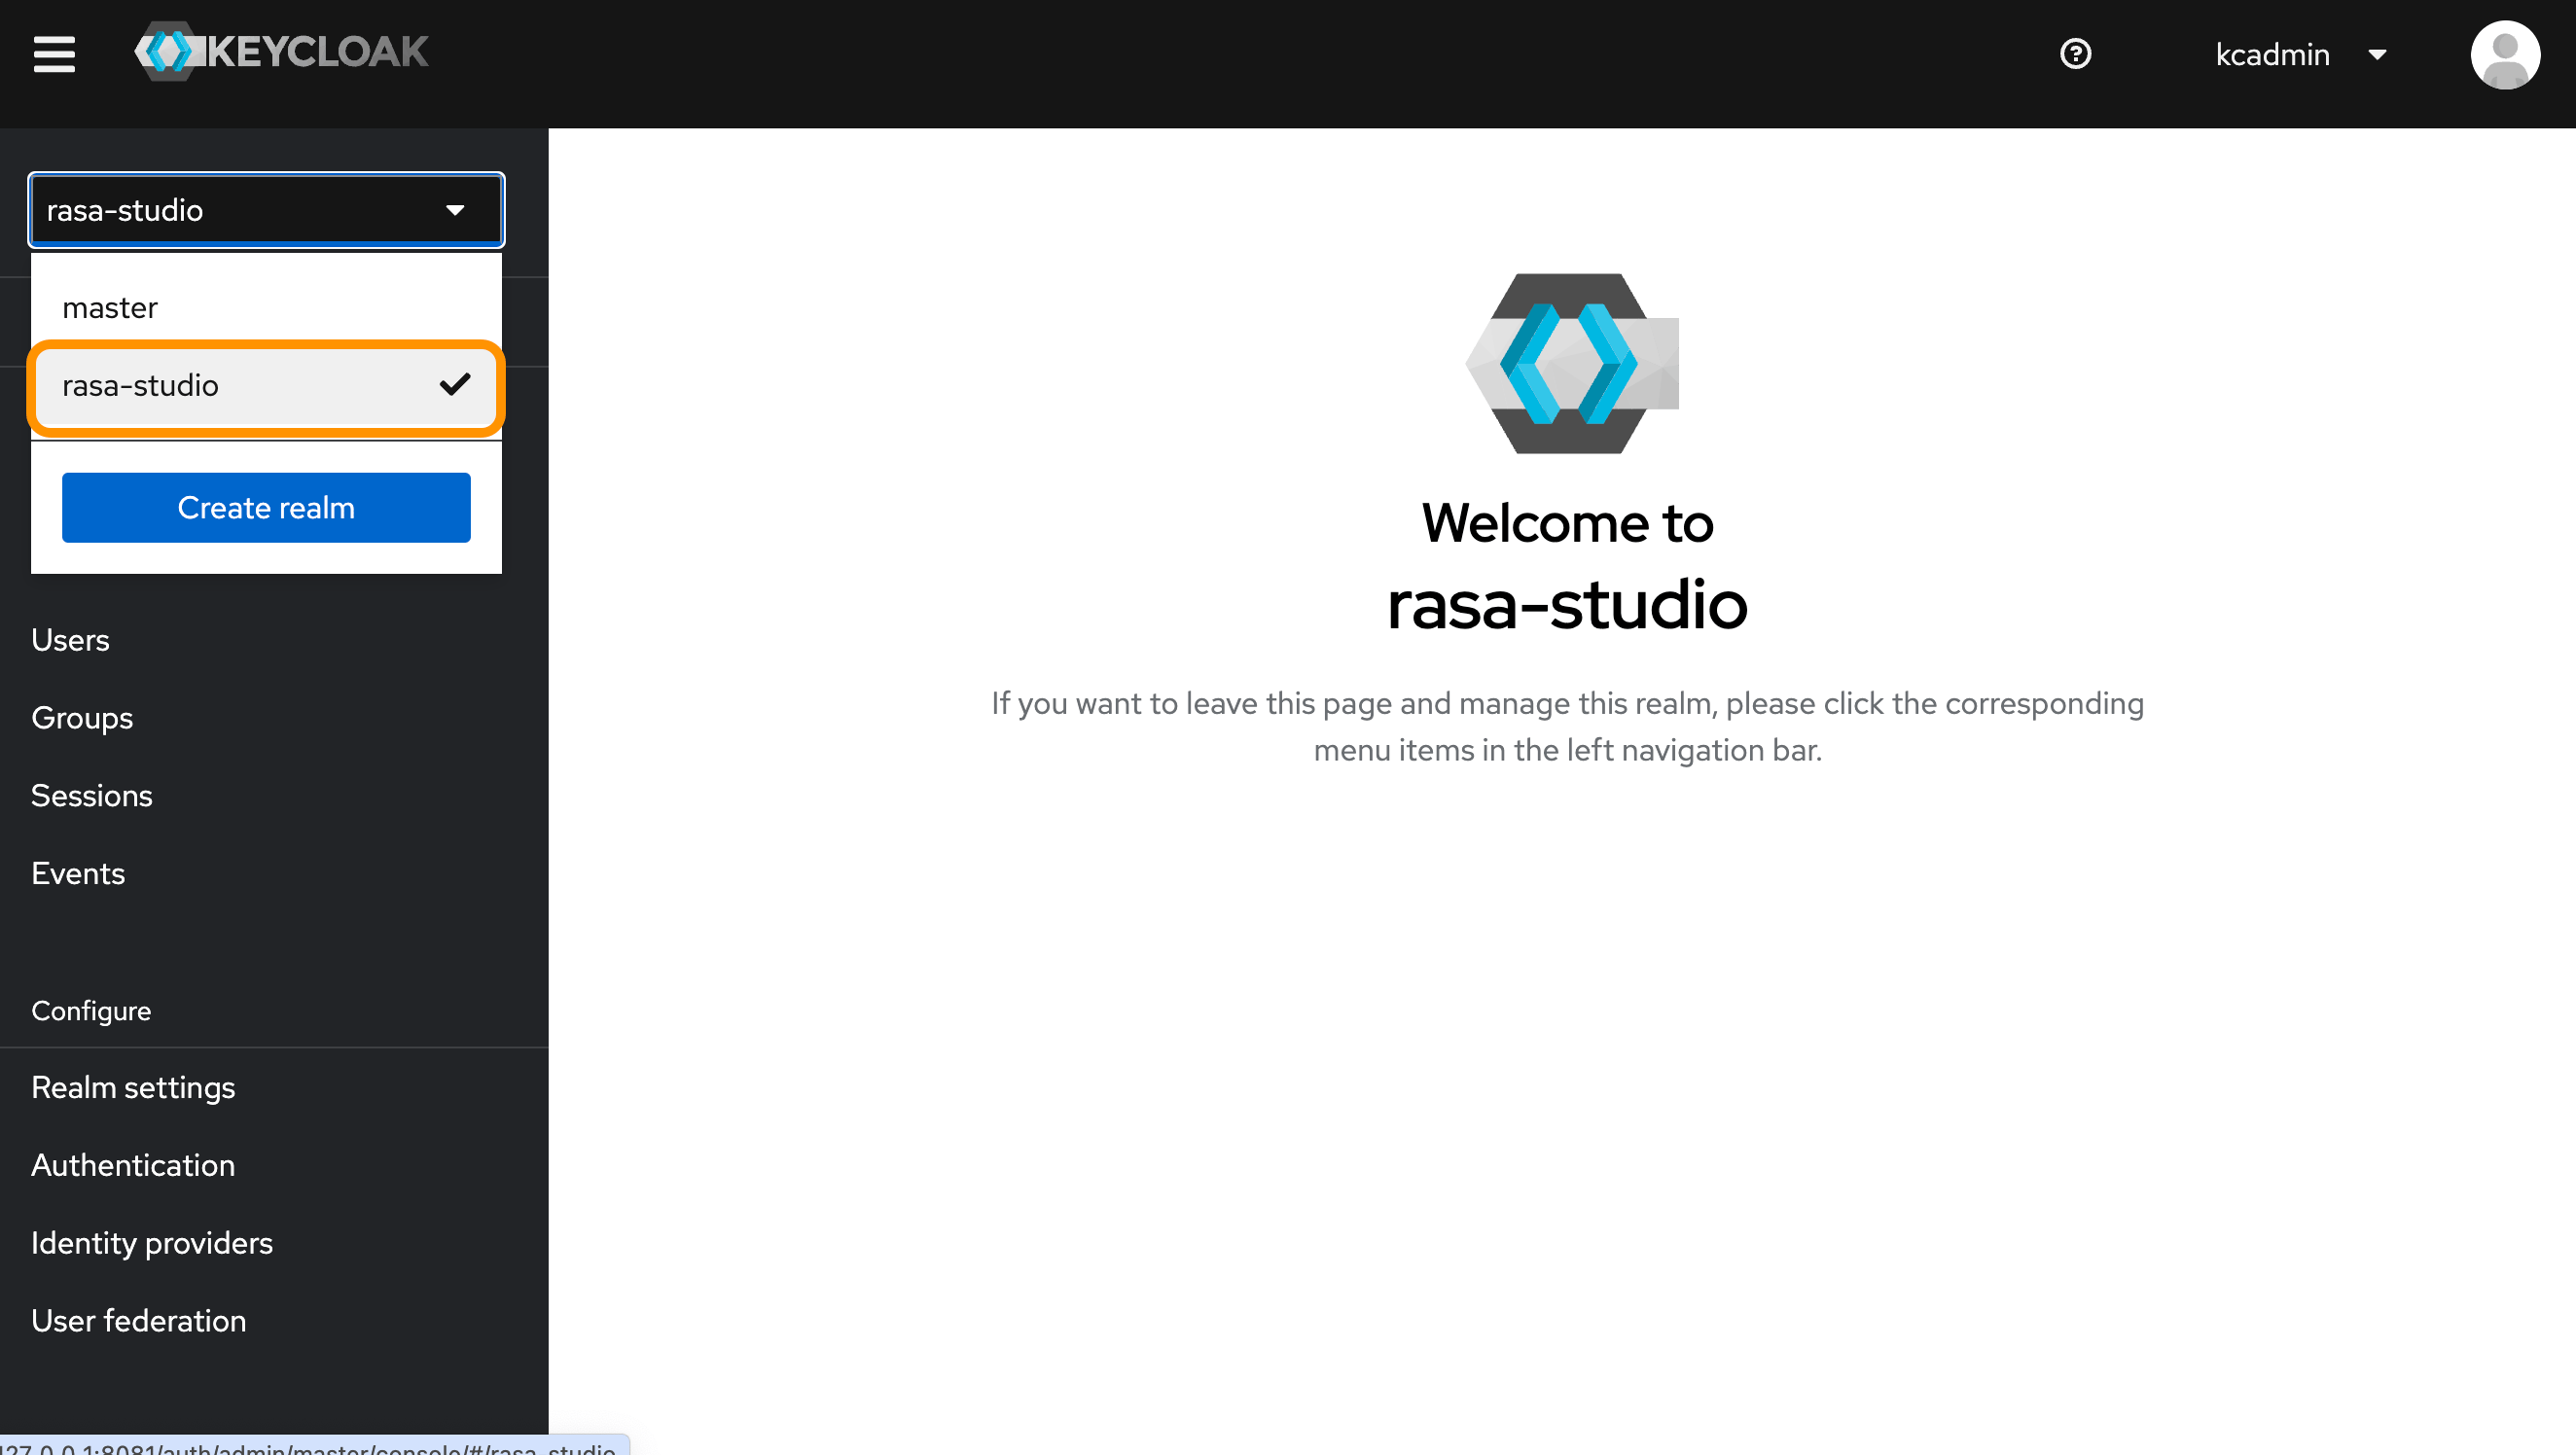
1. Go to Keycloak Admin and log in.
**Note**: Ensure the **rasa-studio** realm is selected from the top-left dropdown.
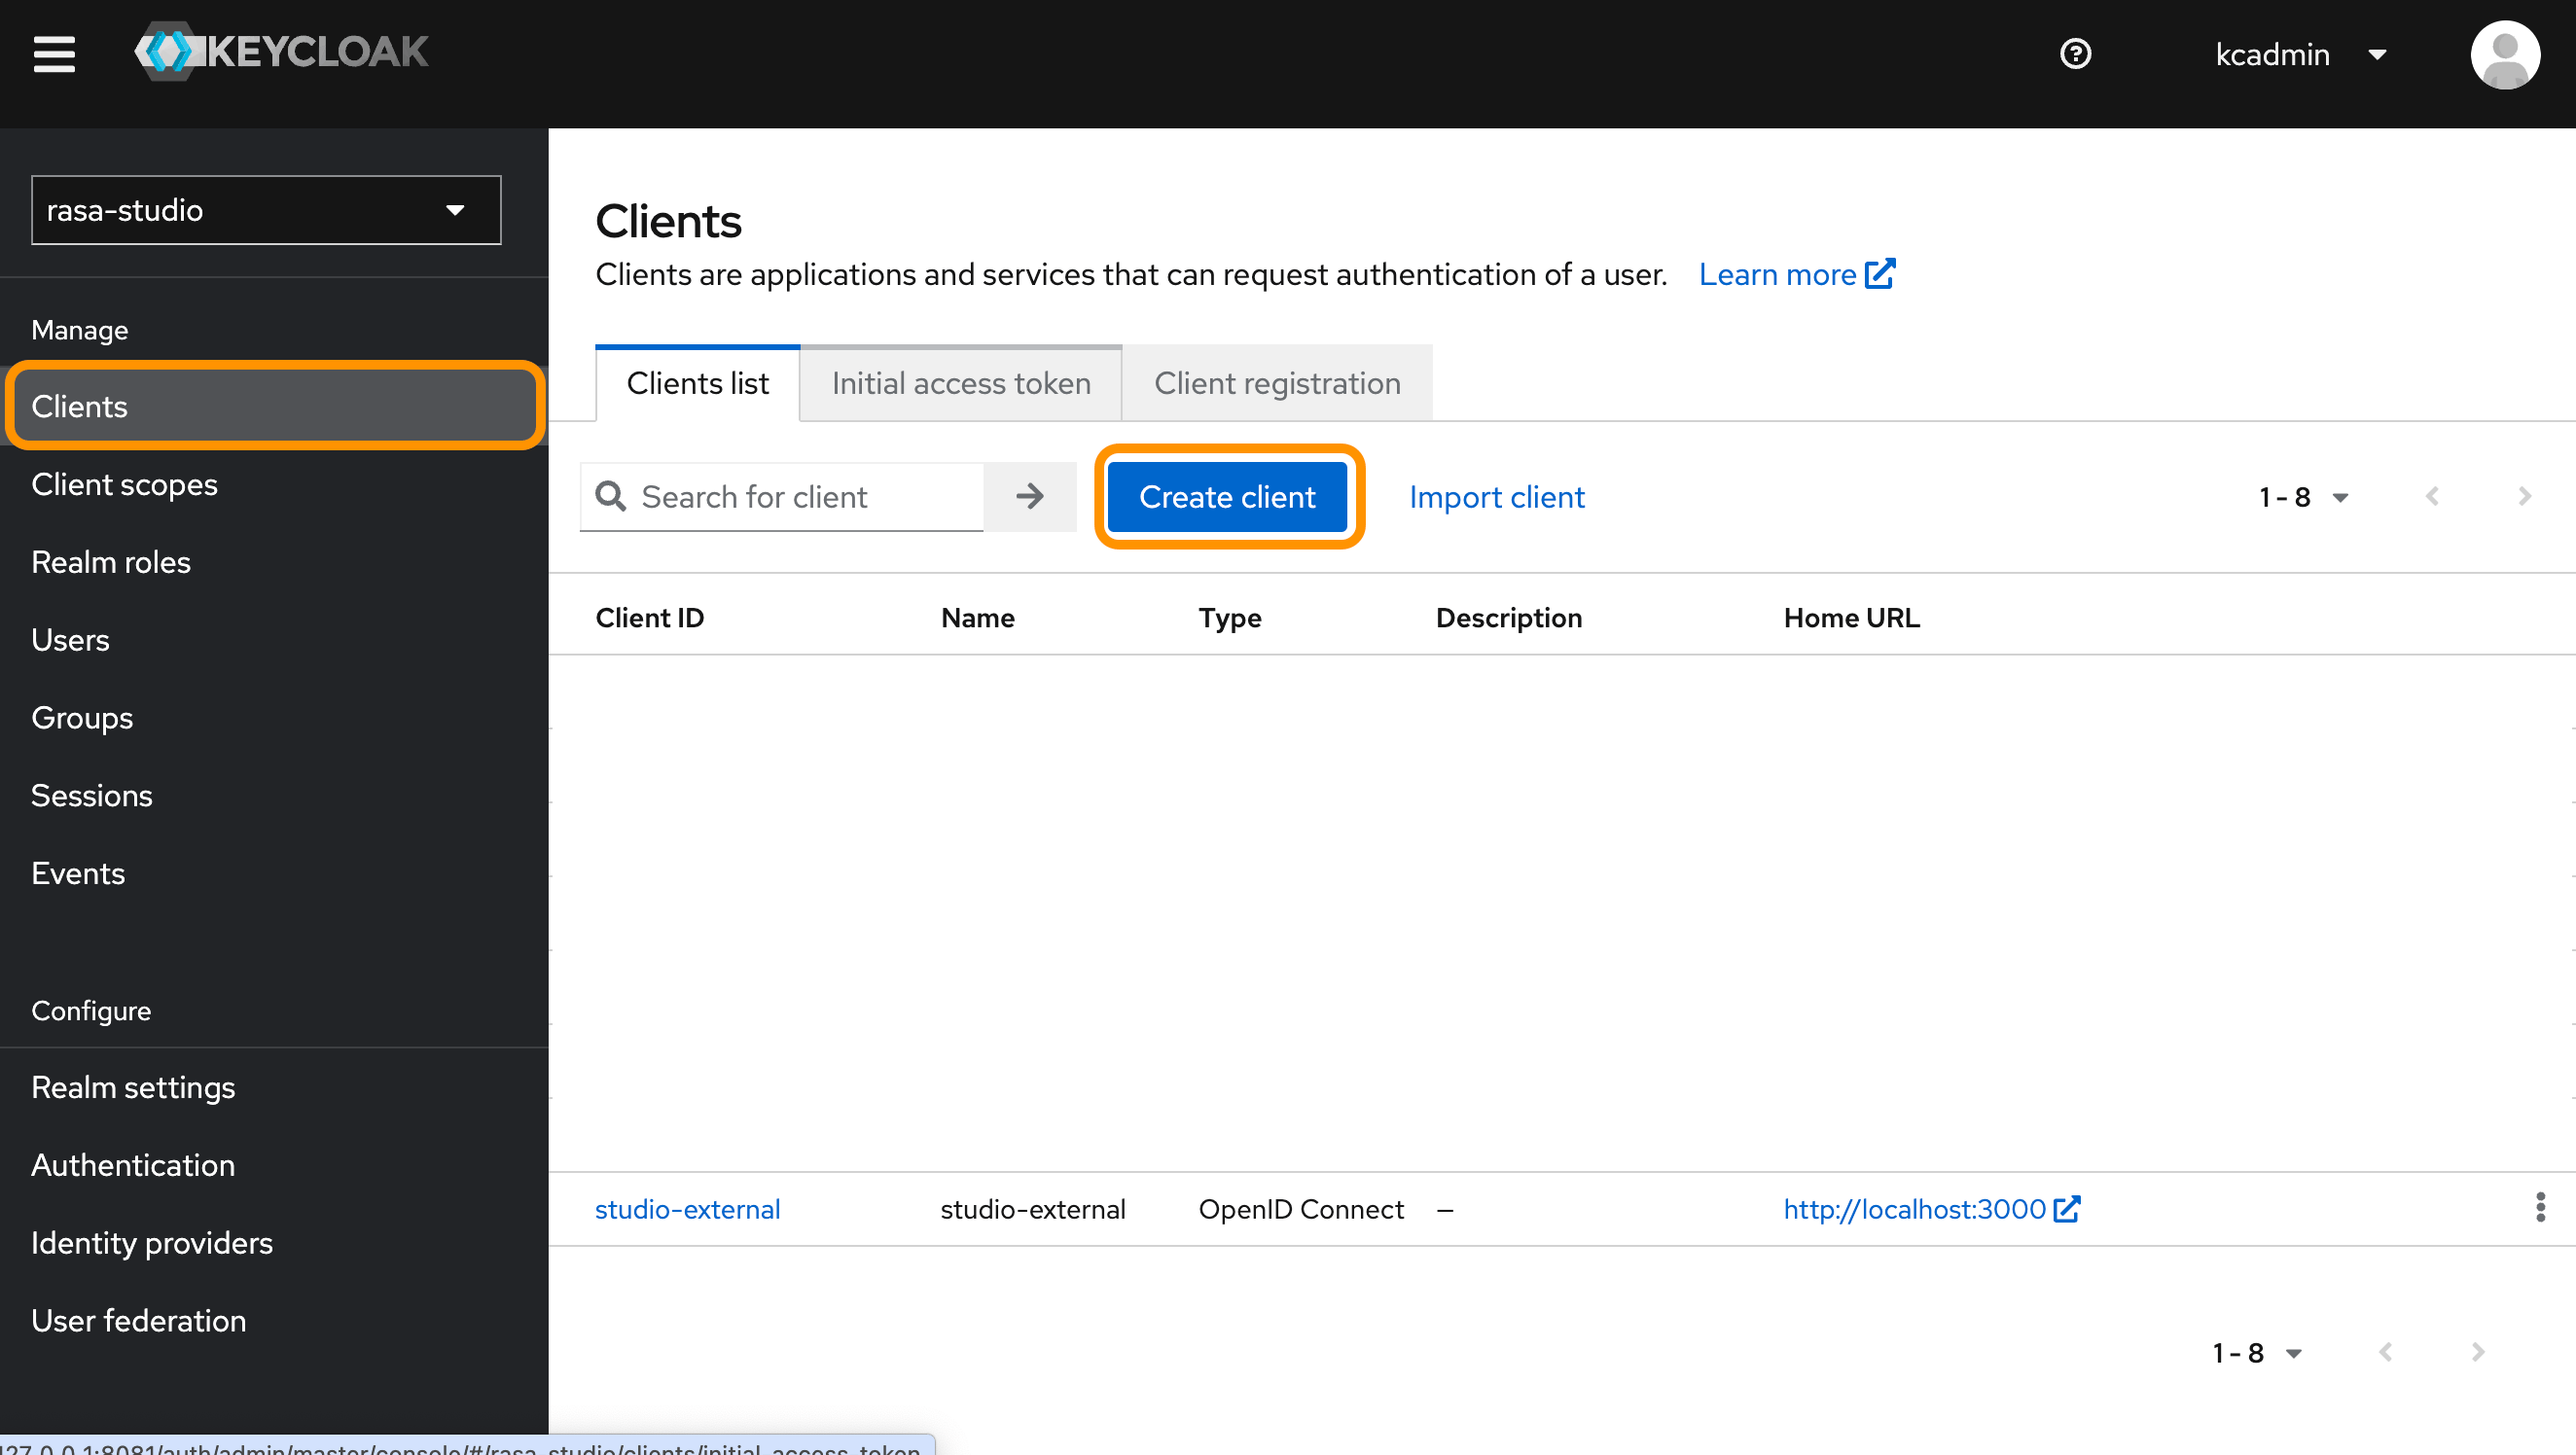
 2. Navigate to the **Clients** tab and click **Create**.
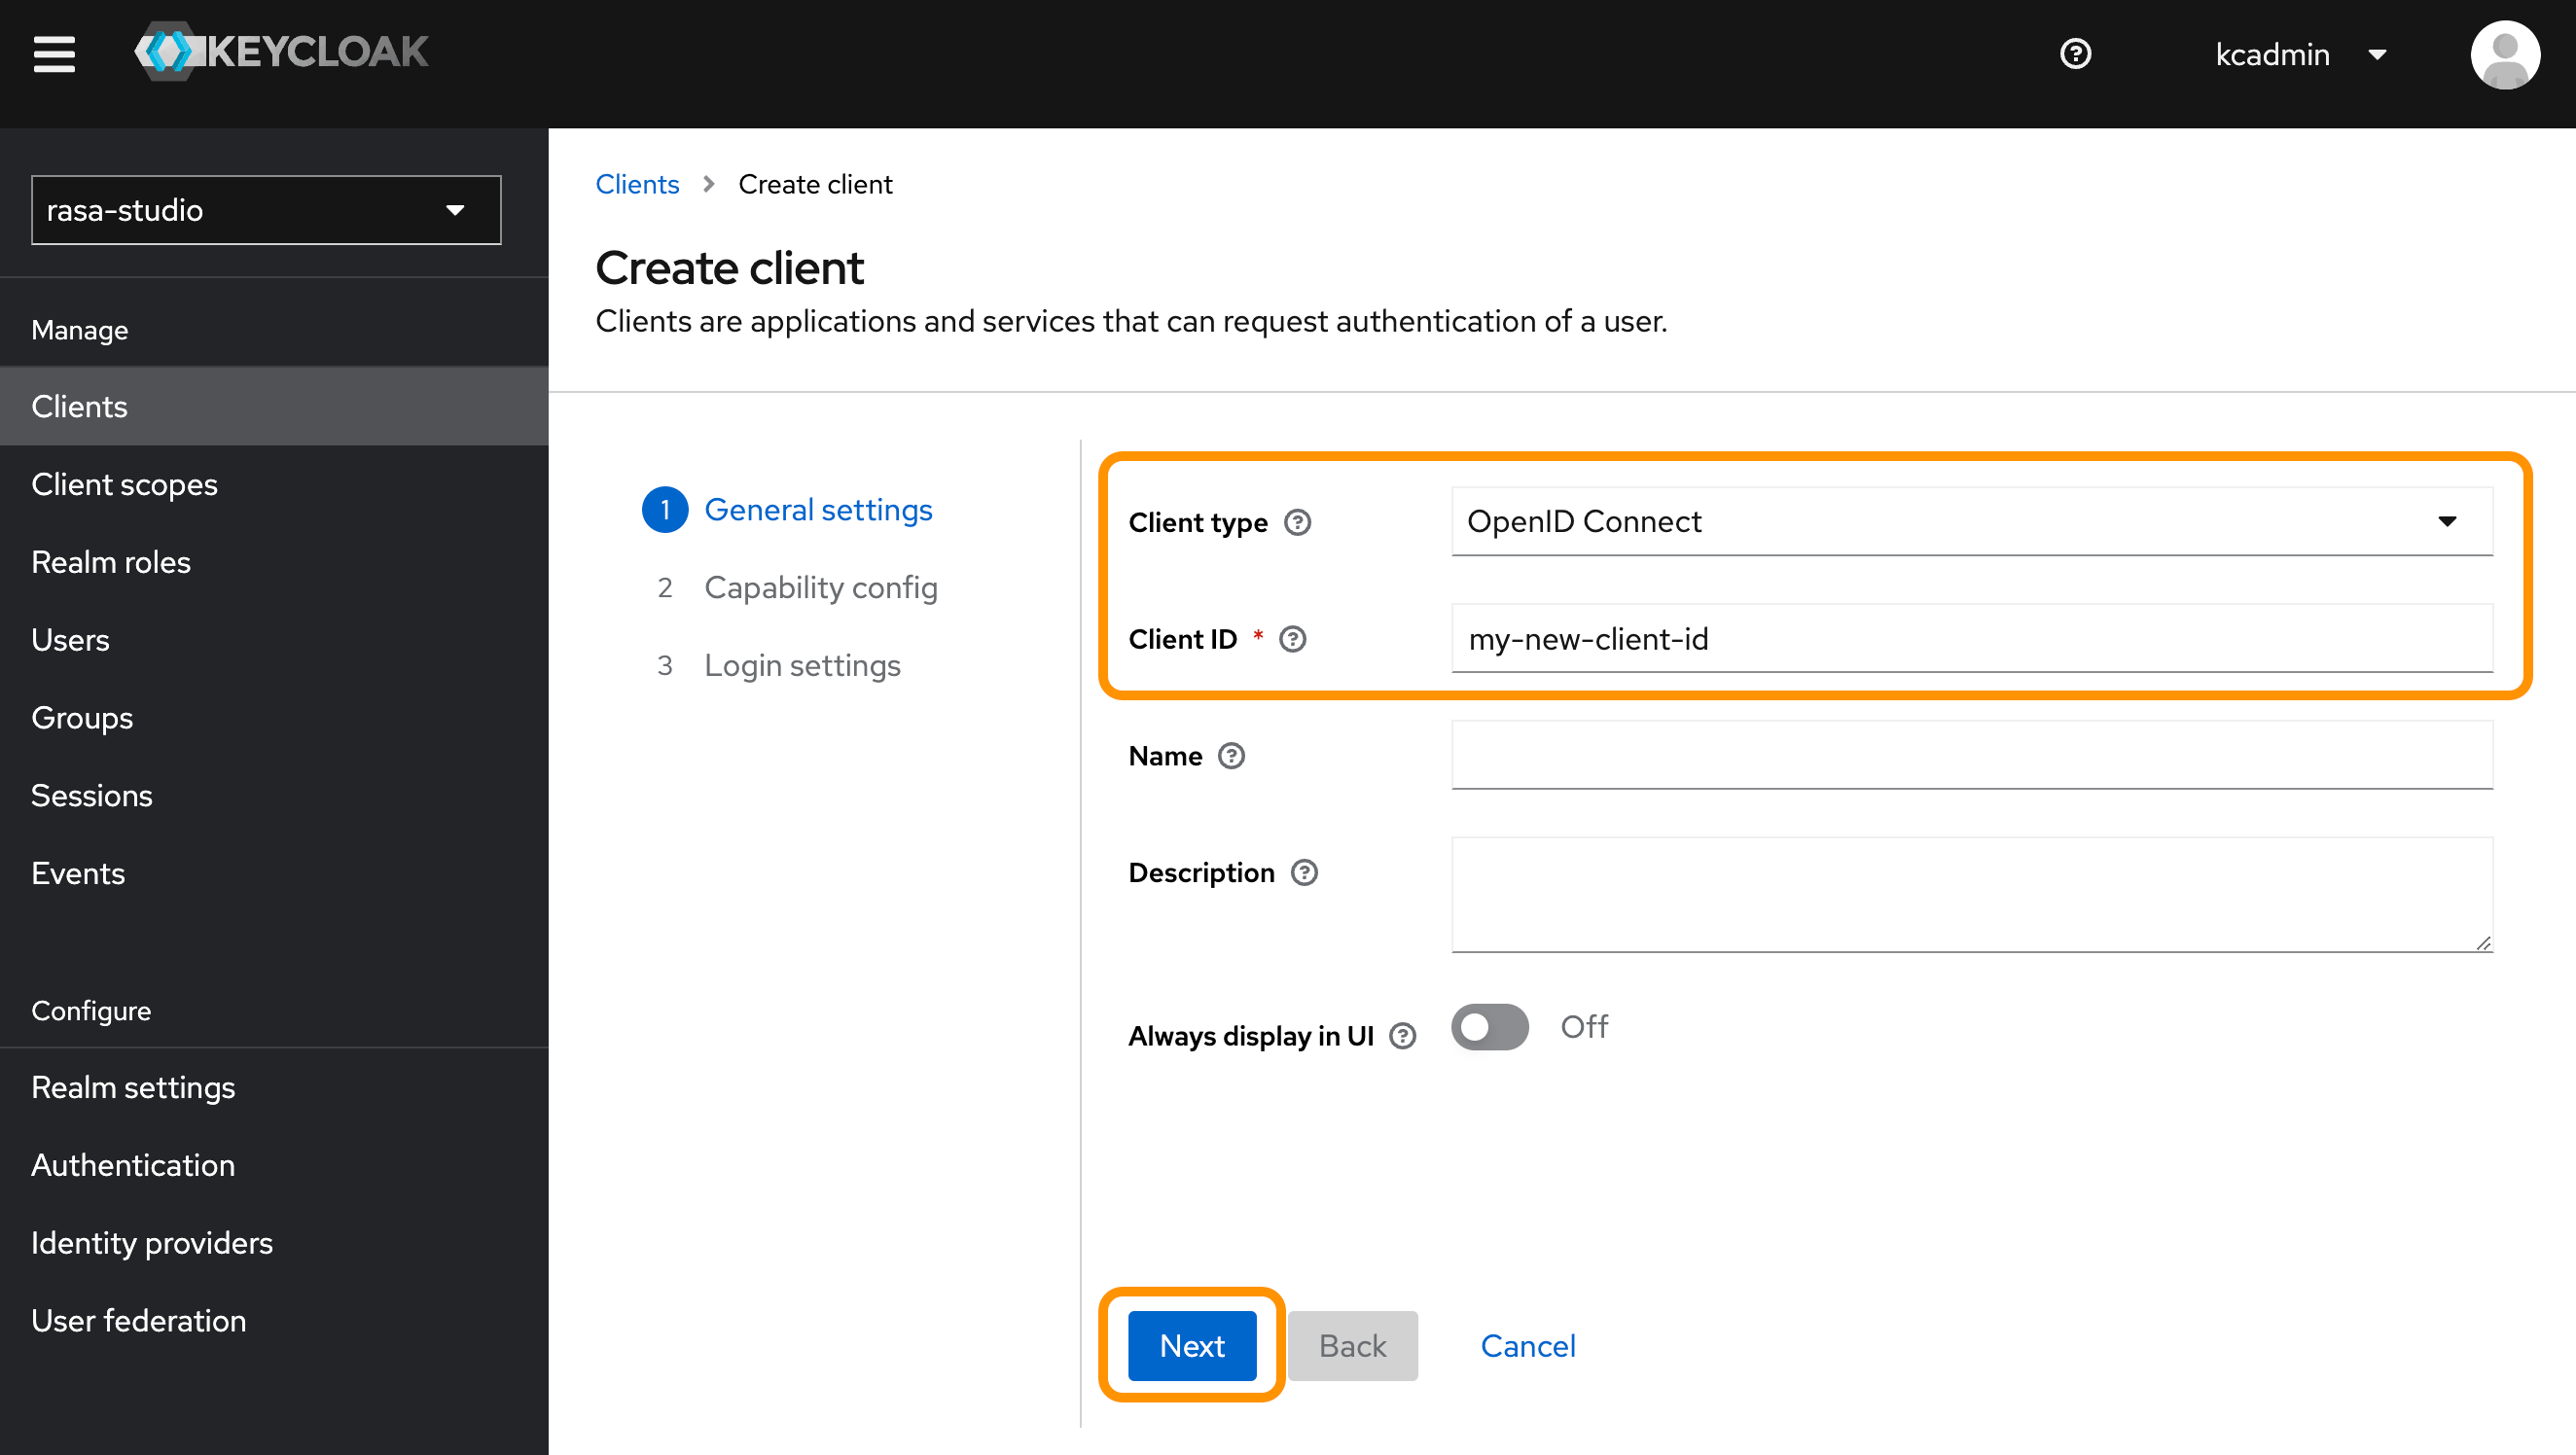
* Set **Client ID** to a name of you choice.
* Set **Client type** to **OpenID Connect**.
* Click **Next**.
2. Navigate to the **Clients** tab and click **Create**.
* Set **Client ID** to a name of you choice.
* Set **Client type** to **OpenID Connect**.
* Click **Next**.
 ### Client Capability Configuration
1. On the **Capability Config** page, enable:
* **Client Authentication**.
* **Service Account Roles** (for **Client Credentials Flow**).
**Warning**: Keep other settings off.
### Client Capability Configuration
1. On the **Capability Config** page, enable:
* **Client Authentication**.
* **Service Account Roles** (for **Client Credentials Flow**).
**Warning**: Keep other settings off.
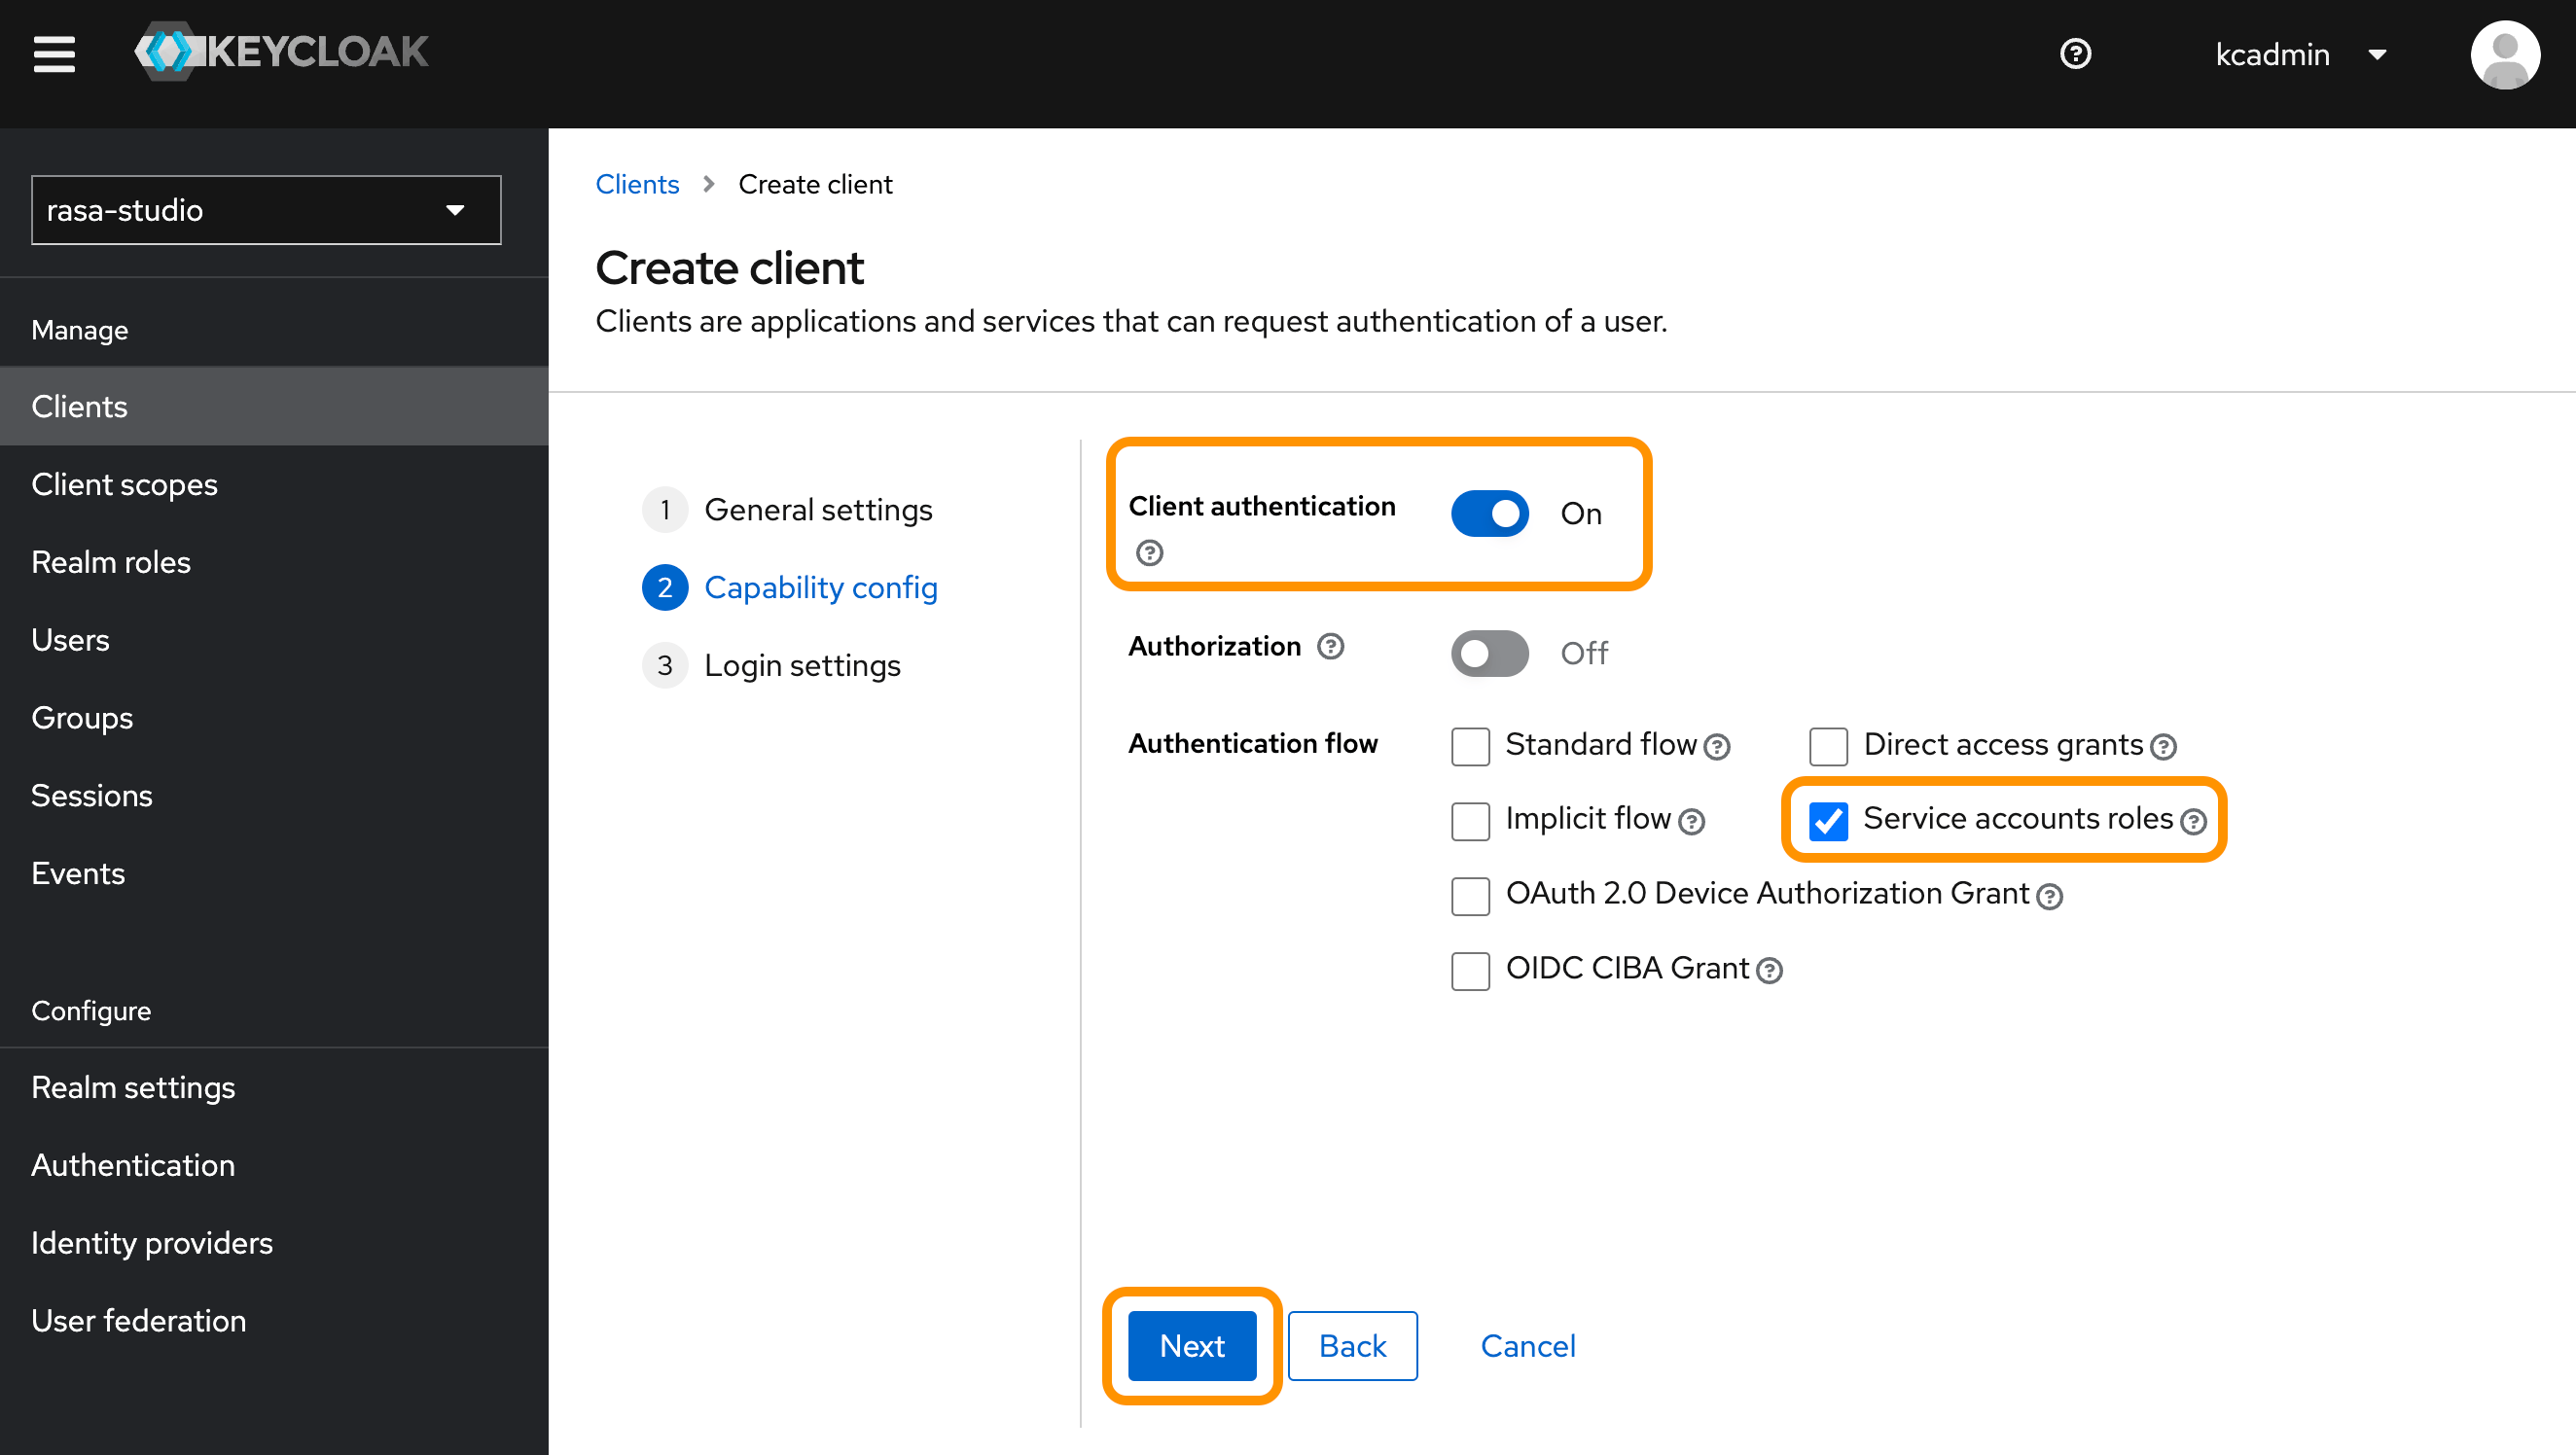 2. Click **Next**.
### Login Settings
On this page click **Save** to finish.
### Assigning a Role to the Client
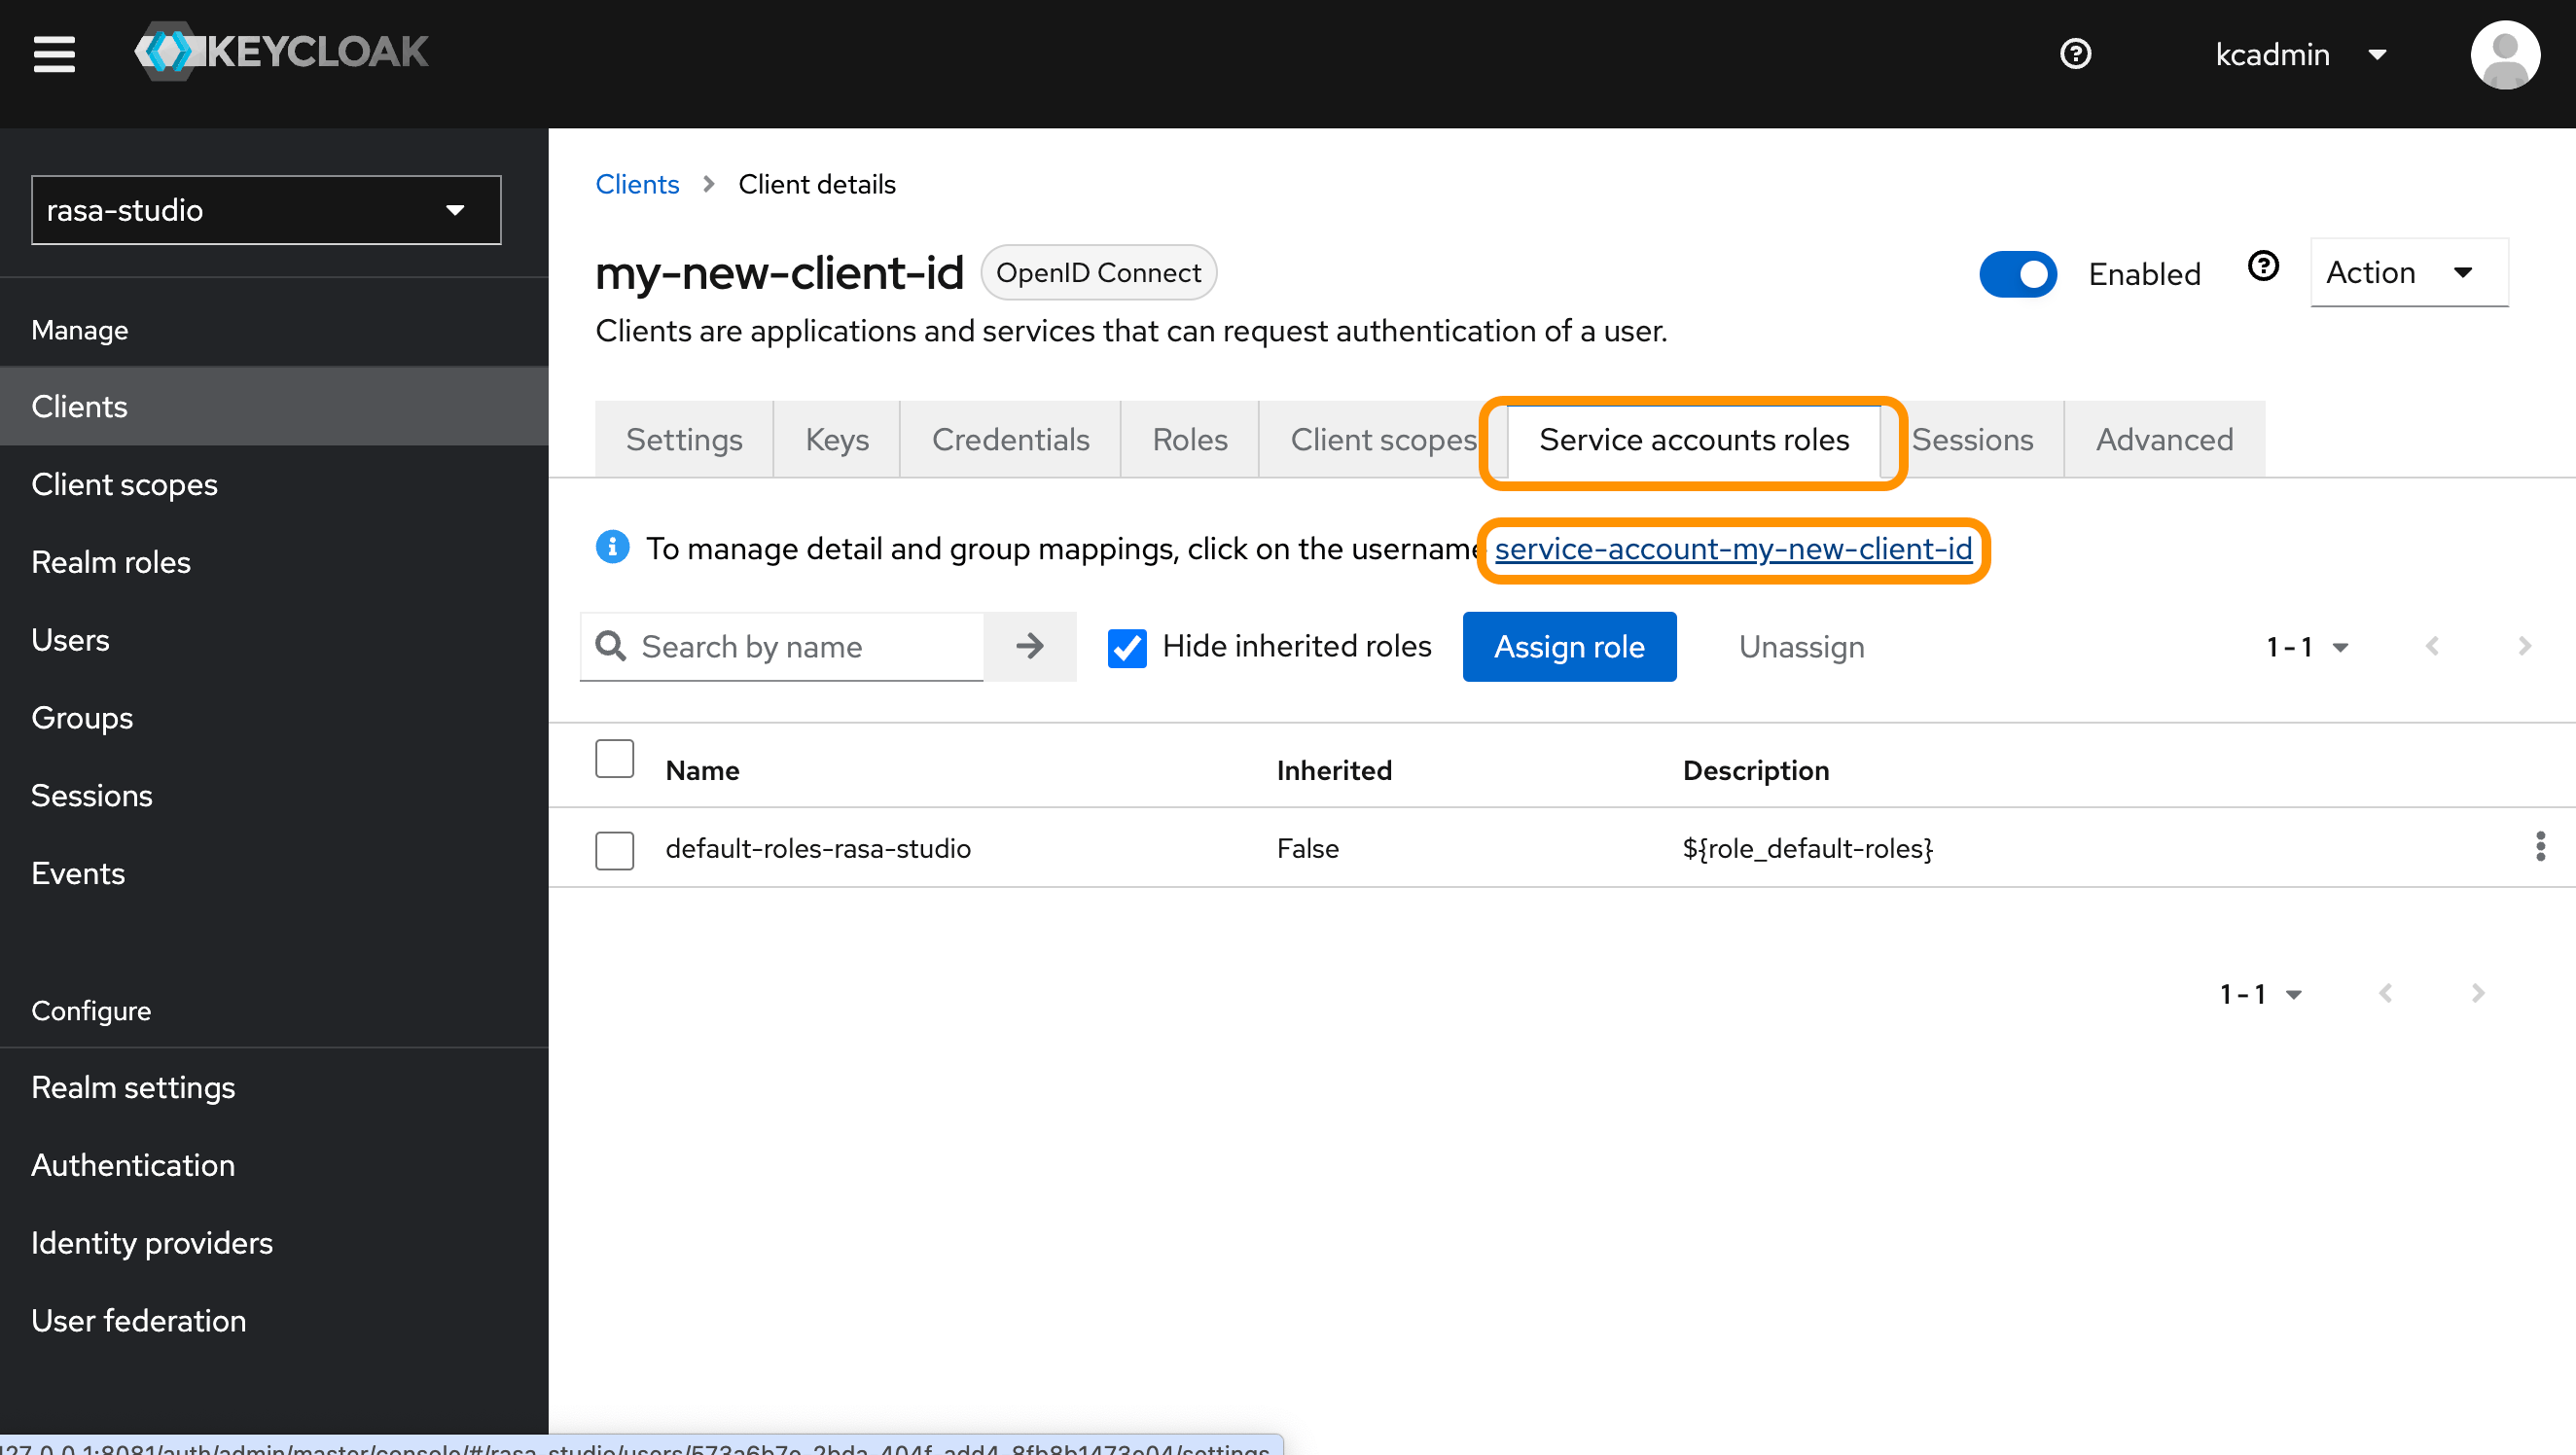
1. Go to **Service Accounts Roles** and click on `service-account-studio-external`.
**Note:** This service account user may have a different name depending on how you name your client.
2. Click **Next**.
### Login Settings
On this page click **Save** to finish.
### Assigning a Role to the Client
1. Go to **Service Accounts Roles** and click on `service-account-studio-external`.
**Note:** This service account user may have a different name depending on how you name your client.
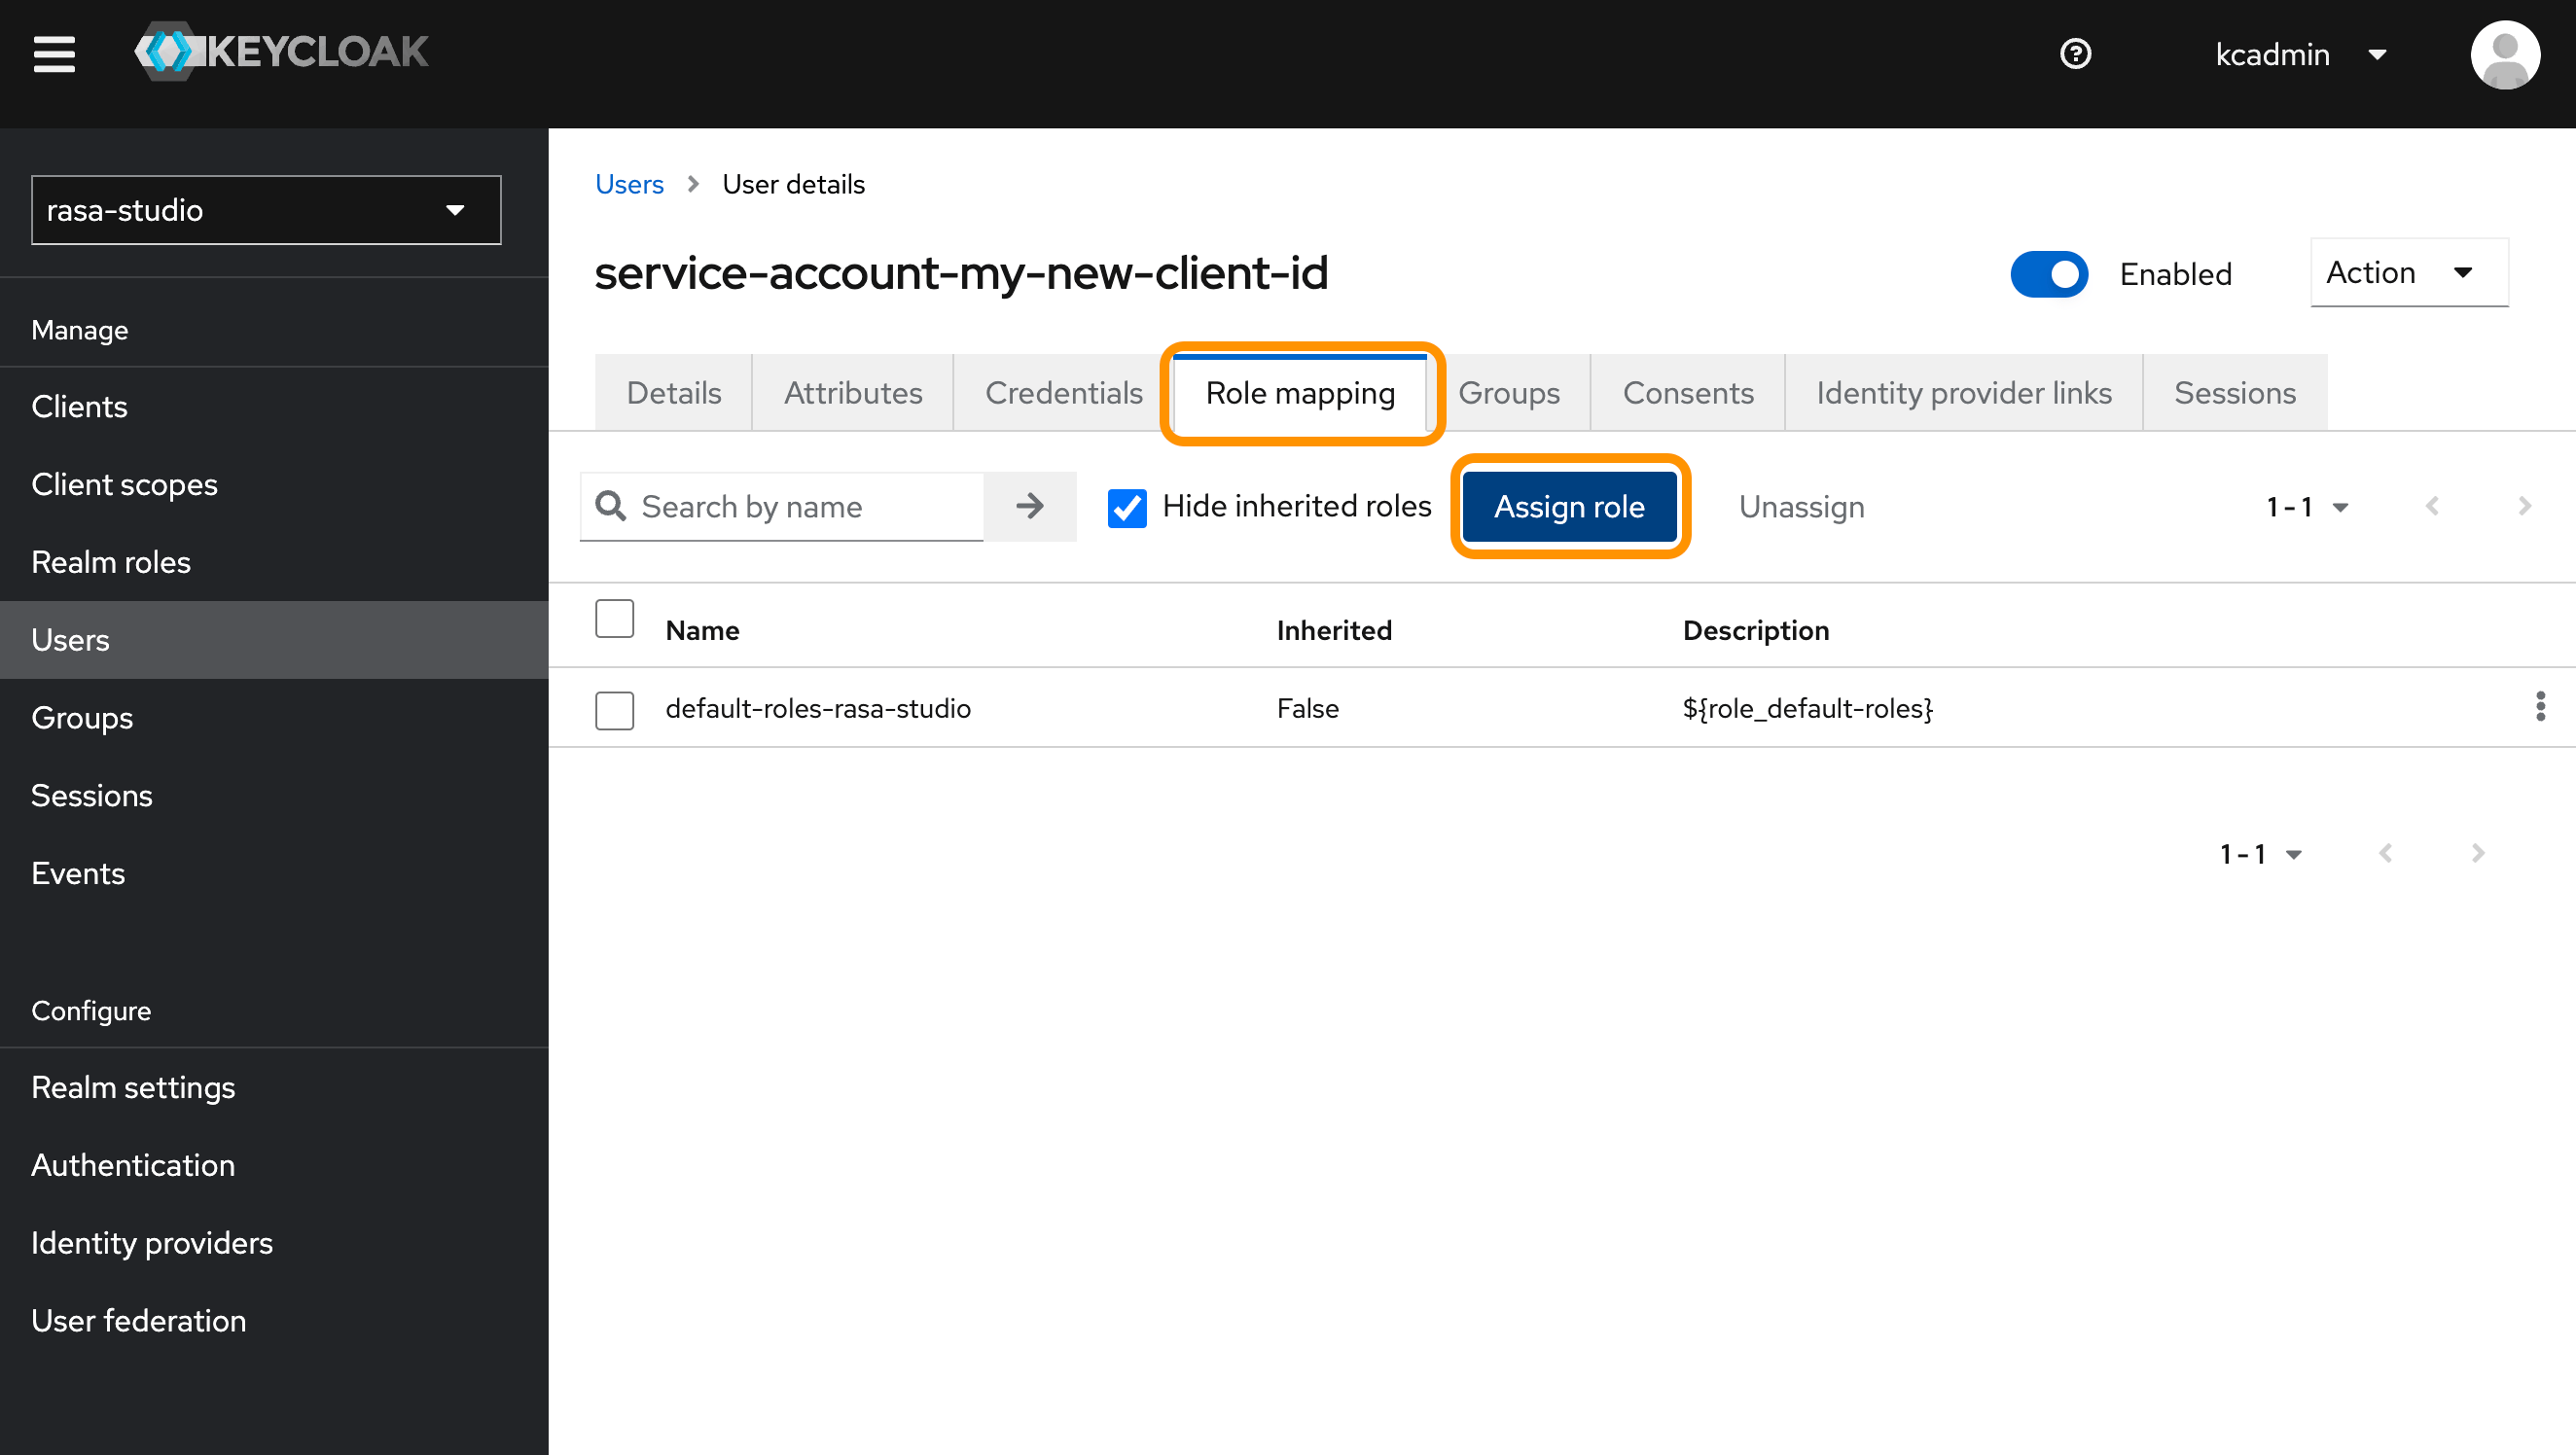
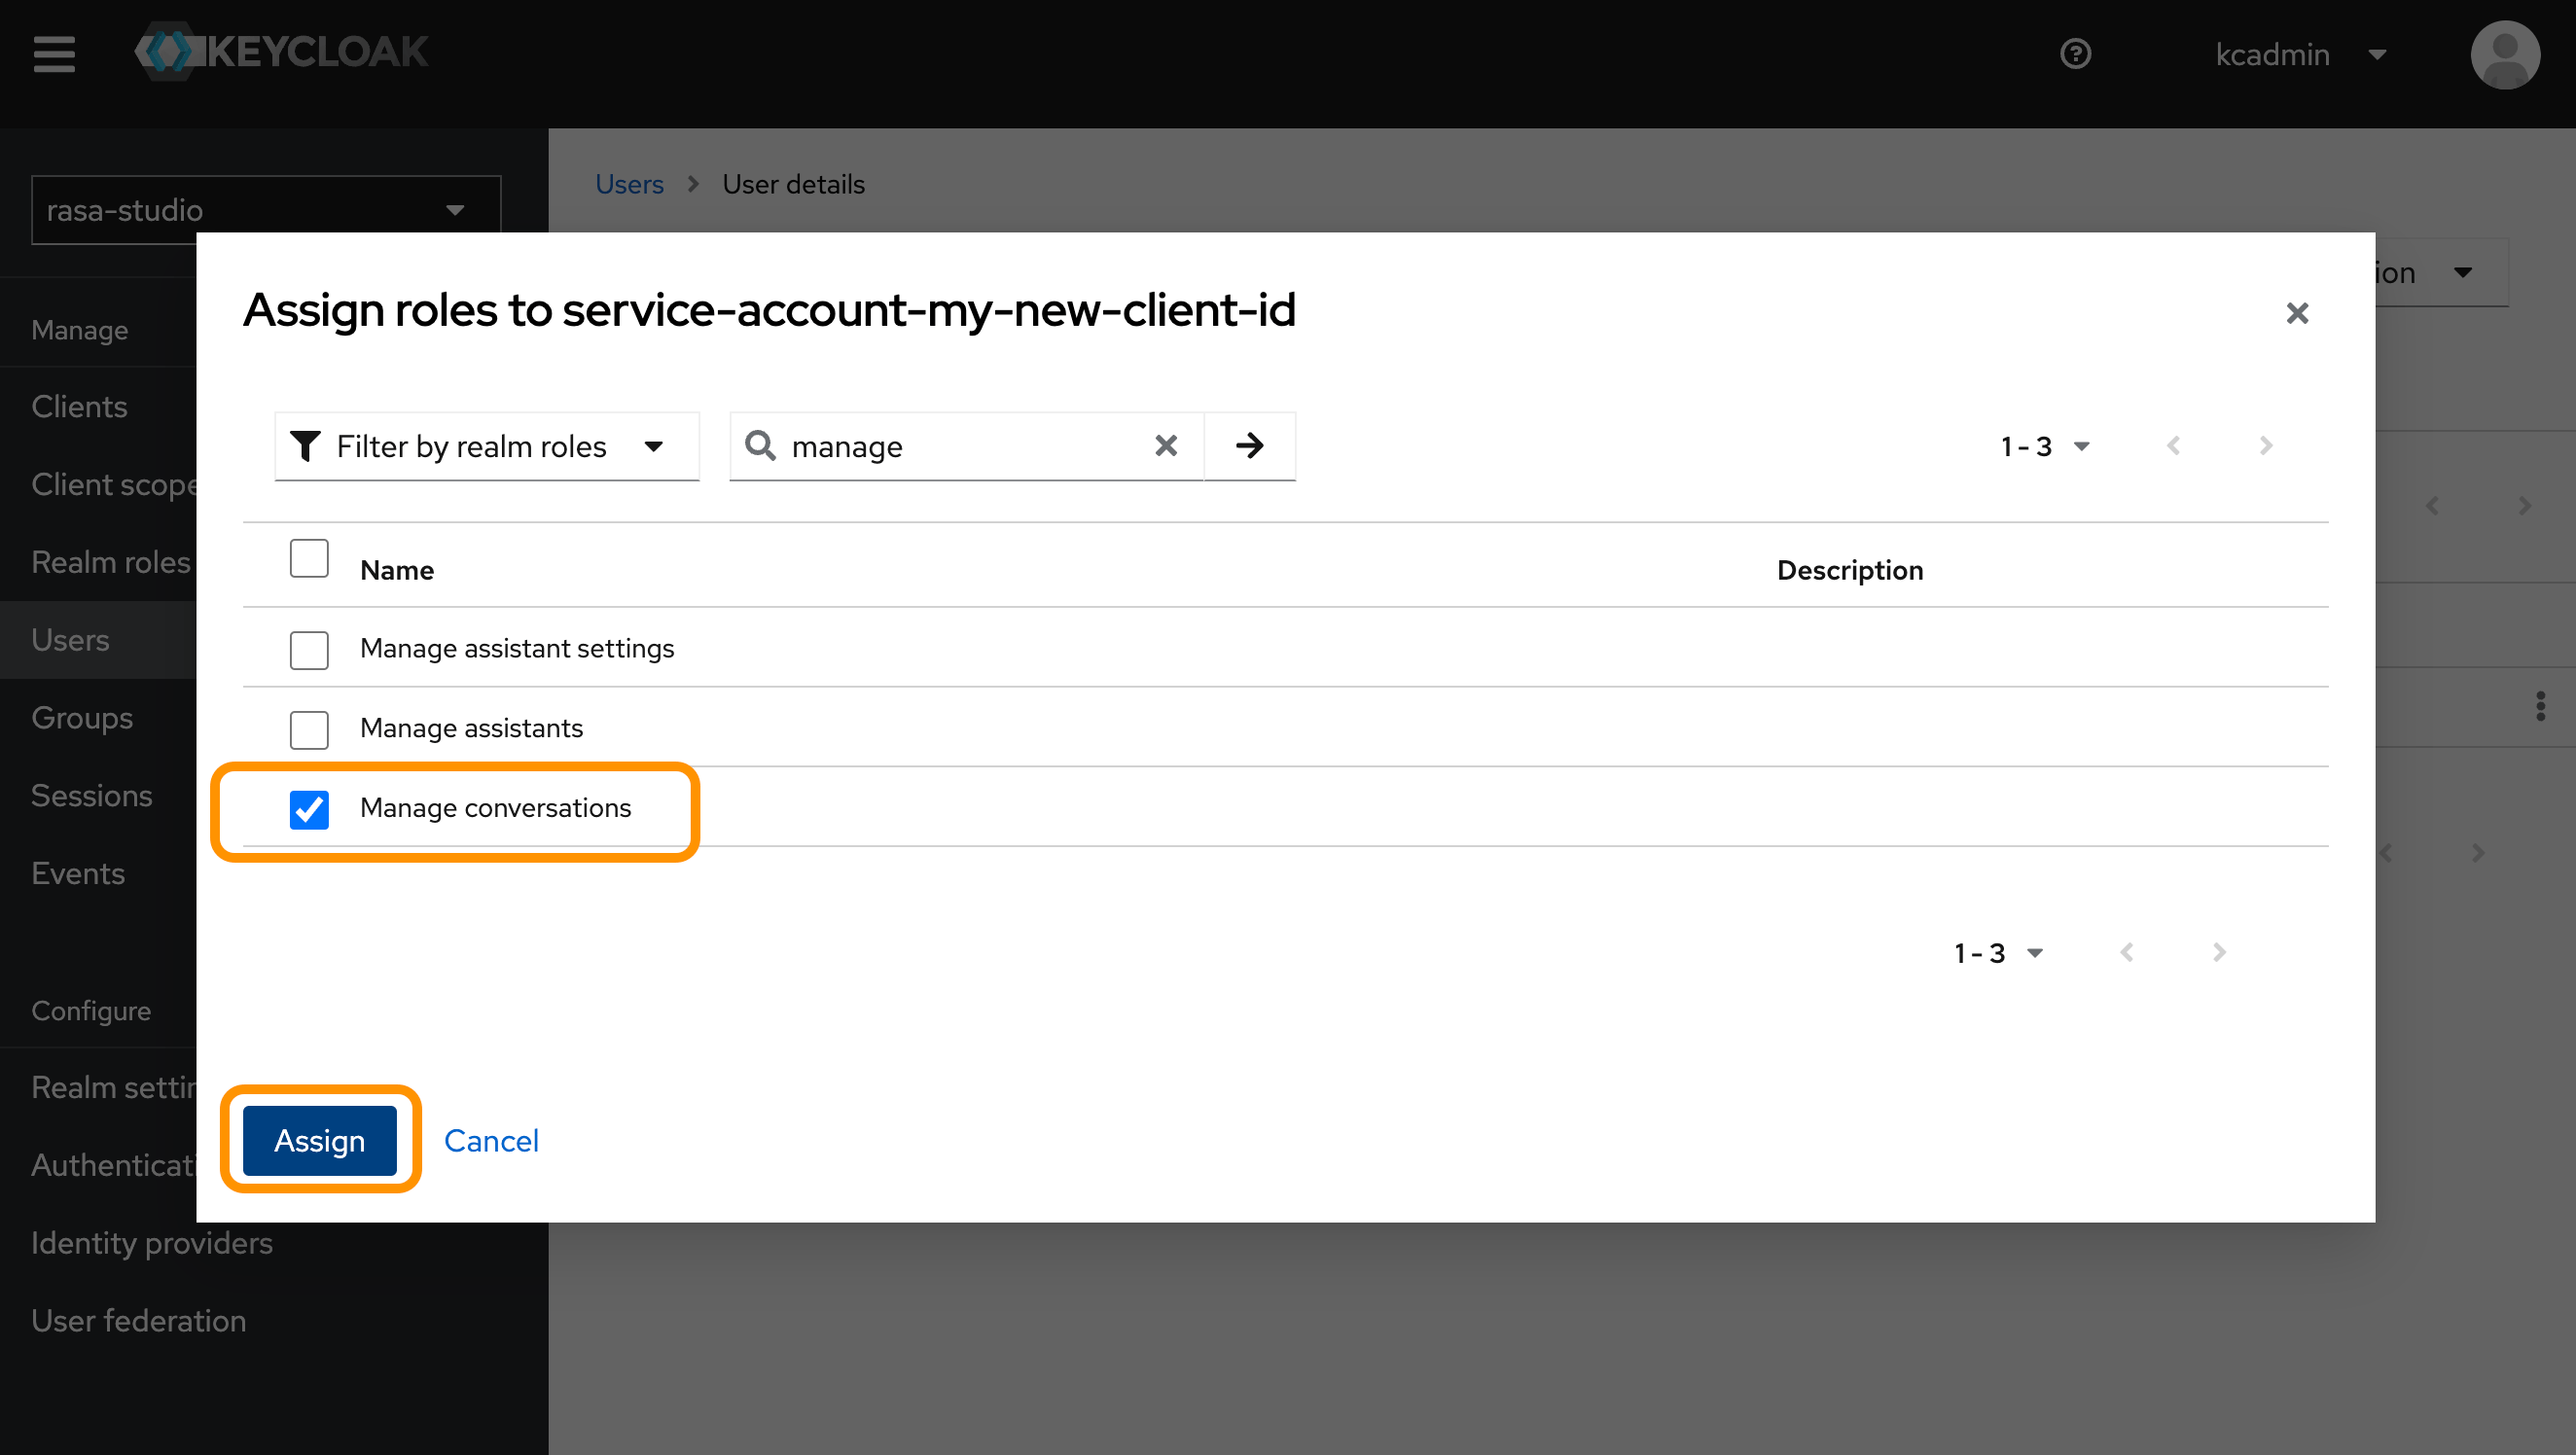
 2. In the **Role Mapping** tab, assign a role to your Client, e.g. **Manage conversations** to enable managing conversations via the API.
 ### Obtaining Client ID and Secret
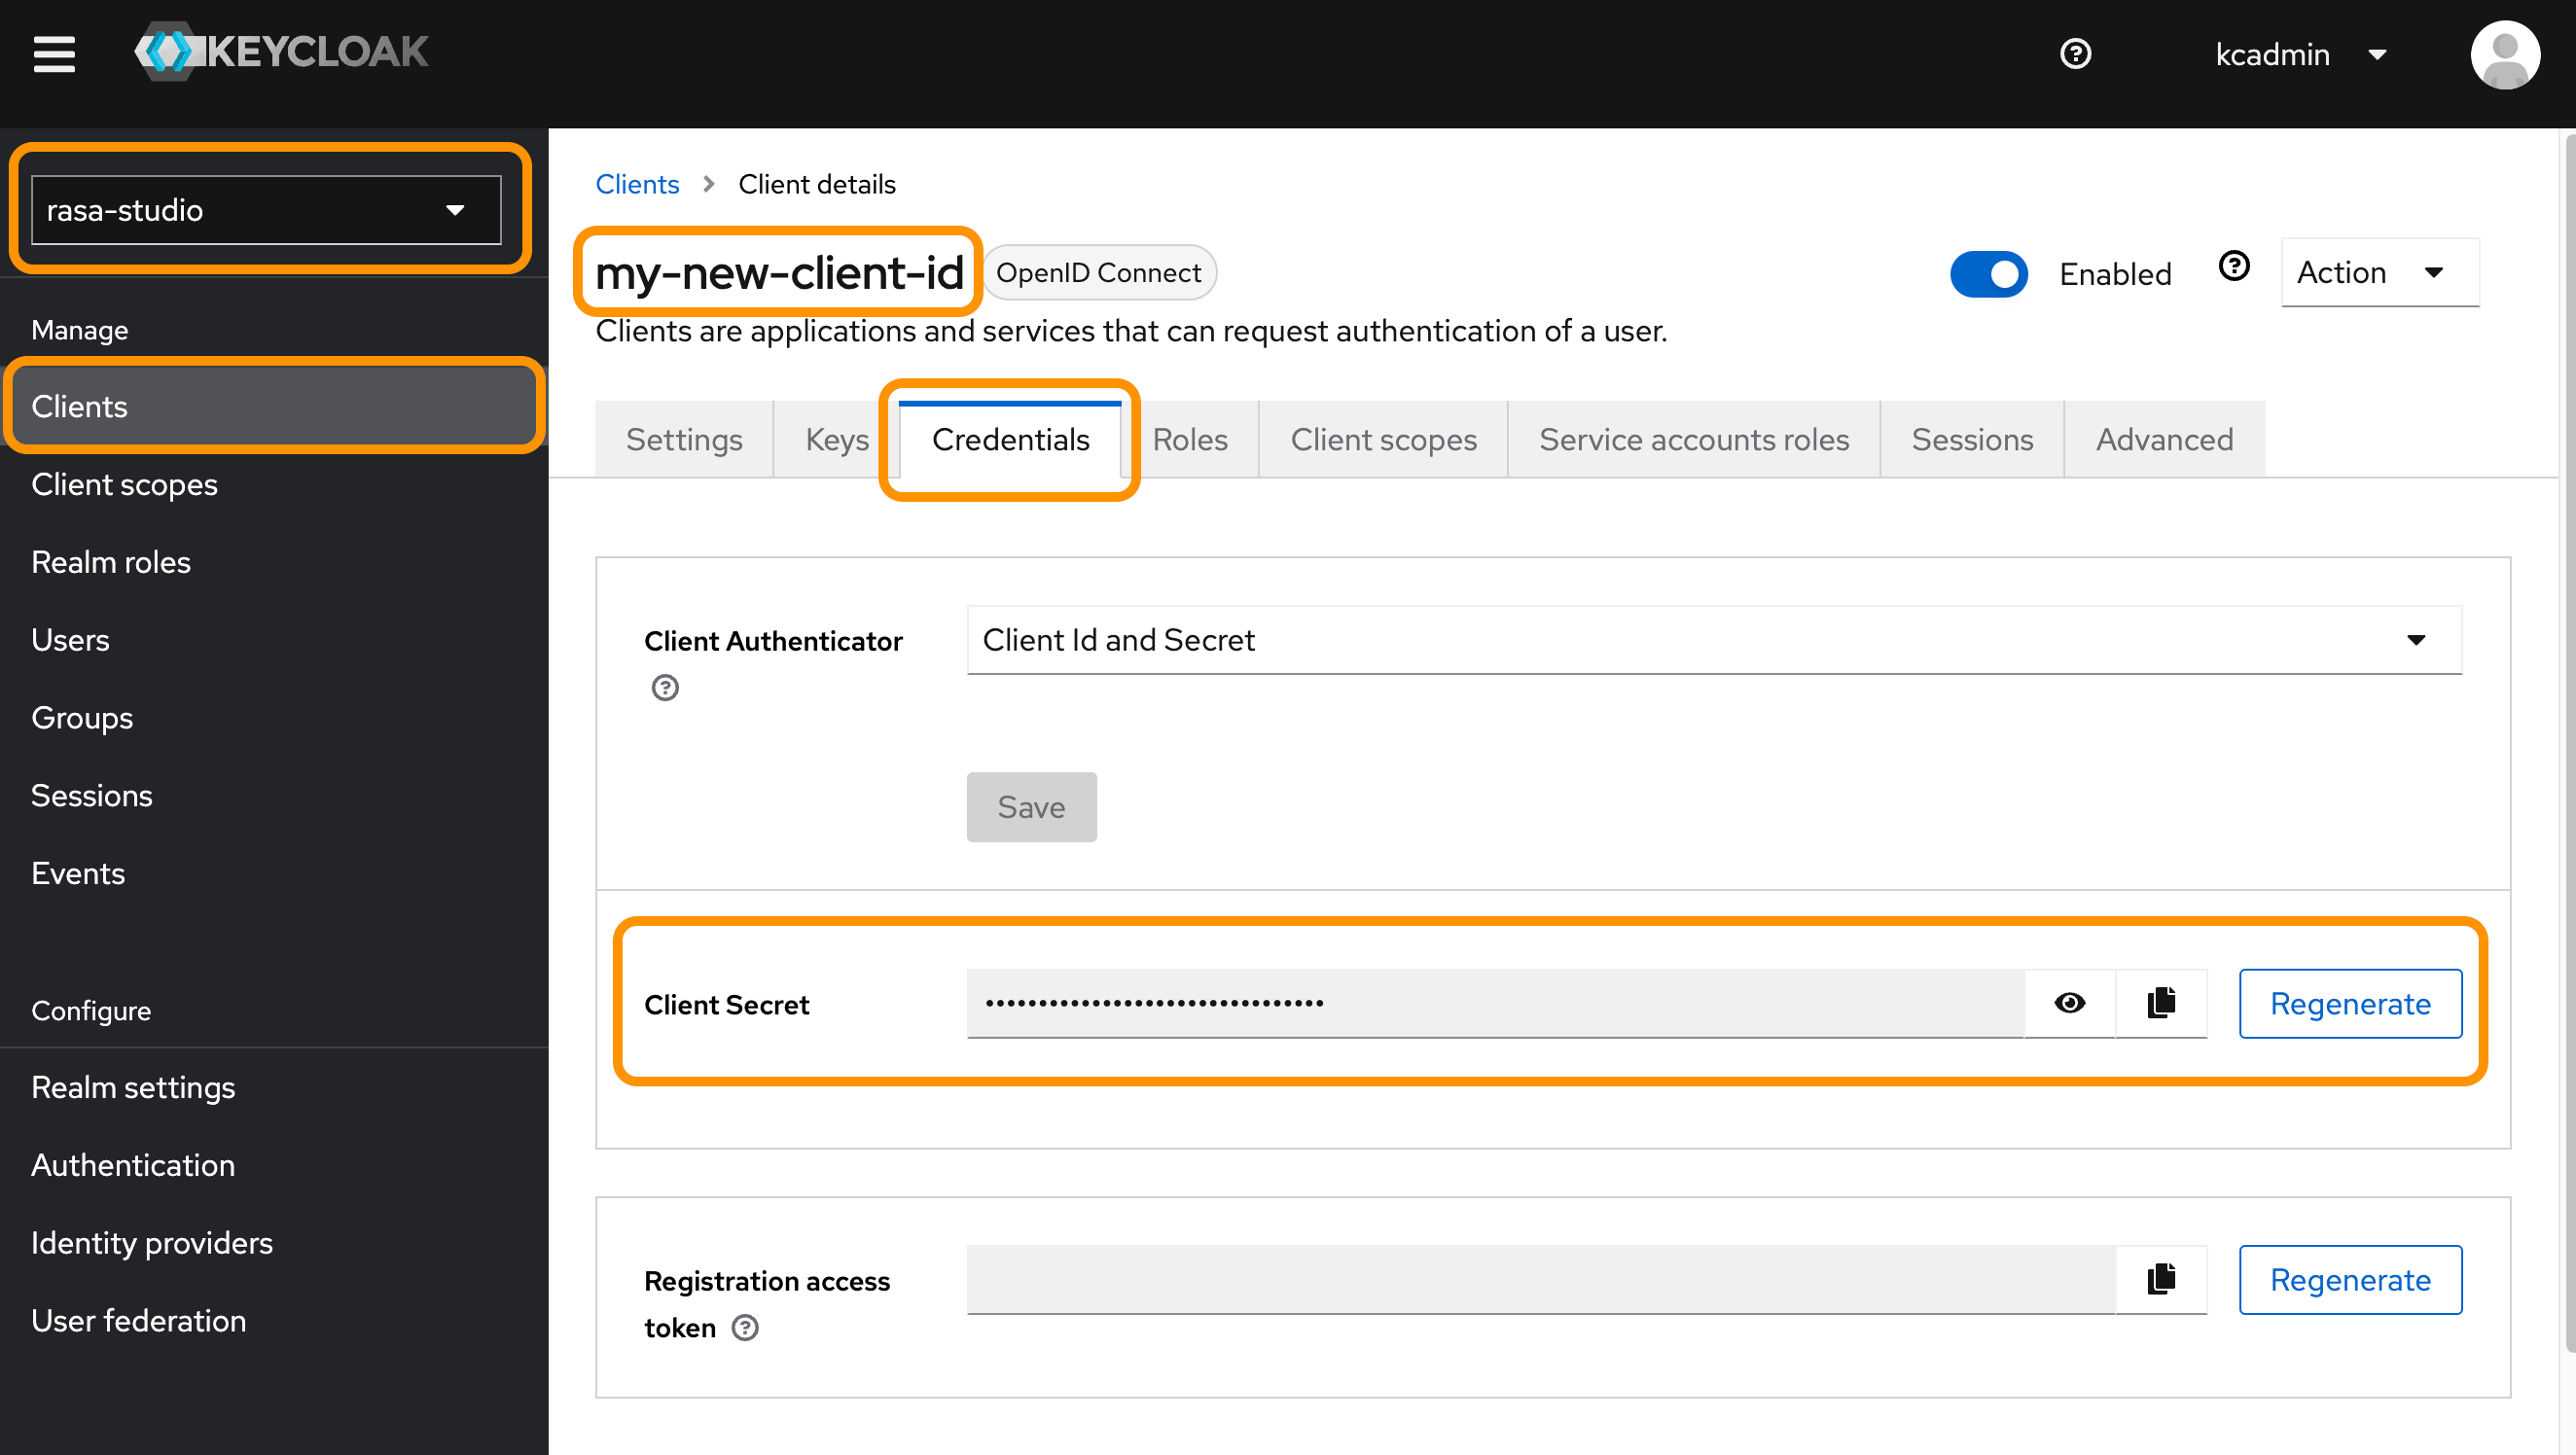
1. Return to the **Clients** tab, make sure the **rasa-studio** realm is selected, select your client, and go to the **Credentials** tab.
2. Click on Regenerate next to the Client Secret field to enhance security.
3. Make sure to note down the new **Client ID** and **Client Secret** for future use.
### Obtaining Client ID and Secret
1. Return to the **Clients** tab, make sure the **rasa-studio** realm is selected, select your client, and go to the **Credentials** tab.
2. Click on Regenerate next to the Client Secret field to enhance security.
3. Make sure to note down the new **Client ID** and **Client Secret** for future use.
 ### Obtain access token
To perform API requests, you must first obtain an access token using a **POST** request.
1. Create a **POST** request to:
https\://\{your-keycloak-address}/auth/realms/rasa-studio/protocol/openid-connect/token
For example, in a local environment, the URL is:
```plaintext theme={null}
https://localhost:8081/auth/realms/rasa-studio/protocol/openid-connect/token
```
2. Set **x-www-form-urlencoded** body parameters:
* `grant_type`: `client_credentials`,
* `client_id`: your new Client ID name,
* `client_secret`: the secret obtained from [Obtain Client ID and Secret](/docs/studio/security/authorization#obtaining-client-id-and-secret)
#### Example curl Request
```bash theme={null}
curl -X POST https://localhost:8081/auth/realms/rasa-studio/protocol/openid-connect/token \
-H "Content-Type: application/x-www-form-urlencoded" \
-d 'grant_type=client_credentials&client_id=&client_secret='
```
You should receive an *access\_token*.
Now, using this token as the **Authorization: Bearer *retrieved\_token*** header, you can send your API requests.
## Related topics
- [Studio Architecture](/docs/reference/architecture/studio.md)
- [Studio Environment Variables](/docs/reference/config/studio-environment-variables.md)
- [Studio Change Log](/docs/reference/changelogs/studio-changelog.md)
- [Studio Infrastructure Requirements](/docs/reference/deployment/studio-hardware-requirements.md)
- [Your First Assistant](/docs/studio/tutorial.md)
### Obtain access token
To perform API requests, you must first obtain an access token using a **POST** request.
1. Create a **POST** request to:
https\://\{your-keycloak-address}/auth/realms/rasa-studio/protocol/openid-connect/token
For example, in a local environment, the URL is:
```plaintext theme={null}
https://localhost:8081/auth/realms/rasa-studio/protocol/openid-connect/token
```
2. Set **x-www-form-urlencoded** body parameters:
* `grant_type`: `client_credentials`,
* `client_id`: your new Client ID name,
* `client_secret`: the secret obtained from [Obtain Client ID and Secret](/docs/studio/security/authorization#obtaining-client-id-and-secret)
#### Example curl Request
```bash theme={null}
curl -X POST https://localhost:8081/auth/realms/rasa-studio/protocol/openid-connect/token \
-H "Content-Type: application/x-www-form-urlencoded" \
-d 'grant_type=client_credentials&client_id=&client_secret='
```
You should receive an *access\_token*.
Now, using this token as the **Authorization: Bearer *retrieved\_token*** header, you can send your API requests.
## Related topics
- [Studio Architecture](/docs/reference/architecture/studio.md)
- [Studio Environment Variables](/docs/reference/config/studio-environment-variables.md)
- [Studio Change Log](/docs/reference/changelogs/studio-changelog.md)
- [Studio Infrastructure Requirements](/docs/reference/deployment/studio-hardware-requirements.md)
- [Your First Assistant](/docs/studio/tutorial.md)